原文:ConstraintLayout basics create chains
作者:Mark Allison
什么是 Chain 链
Chain 链是一种特殊的约束让多个 chain 链连接的 Views 能够平分剩余空间位置。在 Android 传统布局特性里面最相似的应该是 LinearLayout 中的权重比 weight ,但 Chains 链能做到的远远不止权重比 weight 的功能。
开始创建 Chain 链
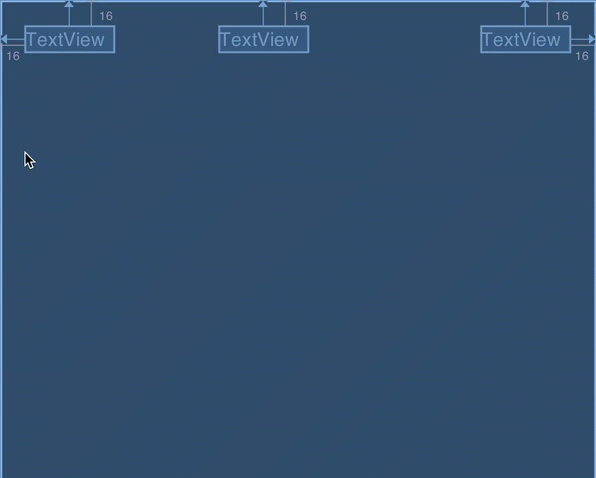
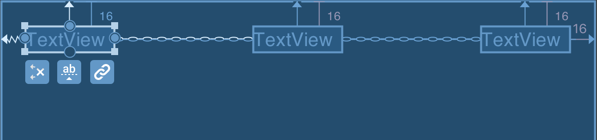
前面概要已经提到了 Chain 链是由多个 Views 组合的,所以要创建一个 Chain 链就需要先选择多个想要链接到一起的 Views ,然后再右键选择 ‘Center Horizontally’ 或者 ‘Center Vertically’ 来创建水平链或者垂直链。如下,创建一个水平链:
首先,可以注意到 Chain 链两边末端的两个 View 已经存在了相对于父组件的左边缘和右边缘的约束。 Chain 链的创建定义的是 Chain 链组件之间的间隙关系,并不影响原有的非成员间的约束。如下刚刚创建后的图中,有很多视图上的标识符需要解释一下。
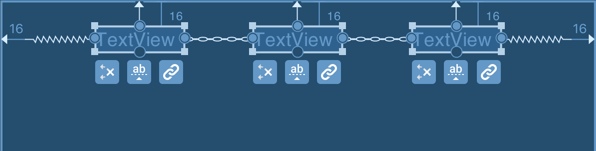
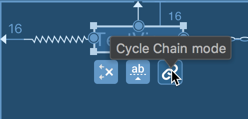
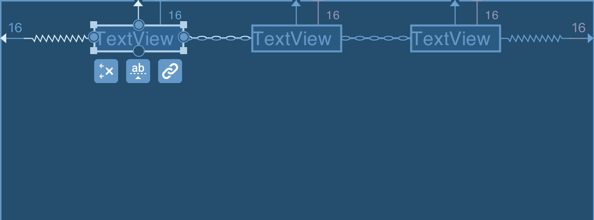
观察截图,可以看到 Chain 链组件之间的连接类似于链条图案,而边缘两端的 View 与 父组件之间的连接类似于弹窗图案。最外面的连接图案代表了 Chain 链的链接模式(chain mode),链接模式决定了 Chain 链如何分配组件之间的剩余空间,你可以从 Chain 链每个组件下面的 “转换 Chain 模式” 按钮来切换 Chain 链模式。
Chain 链模式一共有三种,分别为:spread ,spread_inside 和 packed 。
Spread Chain 链模式
Chain 链的默认模式就是 spread 模式,它将平分间隙让多个 Views 布局到剩余空间。
Spread Inside Chain 链模式
Chain 链的另一个模式就是 spread inside 模式,它将会把两边最边缘的两个 View 到外向父组件边缘的距离去除,然后让剩余的 Views 在剩余的空间内平分间隙布局。
Packed Chain 链模式
最后一种模式是 packed ,它将所有 Views 打包到一起不分配多余的间隙(当然不包括通过 margin 设置多个 Views 之间的间隙),然后将整个组件组在可用的剩余位置居中:
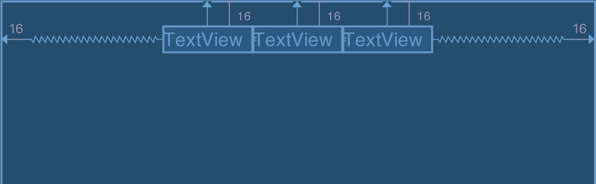
在 packed chain 链模式,打包在一起的 Views 组可以进一步通过控制修改 bias 值来控制打包组的位置,在例子中 bias 模式是 0.5 将 Views 组居中。
Spread Chain 链的权重
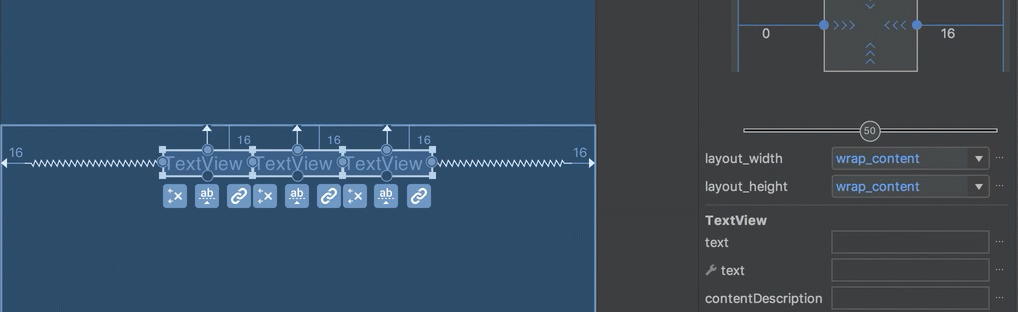
spread 和 spread inside Chain 链可以设置每个组件的 weight 权重,这跟 LinearLayout 的 weight 权重设置很像。当前版本(Android Studio 2.4 alpha 7)的视图编辑器不能直接操作设置这个权重,不过我们可以通过属性视图(properties 视图)来手动设置属性。

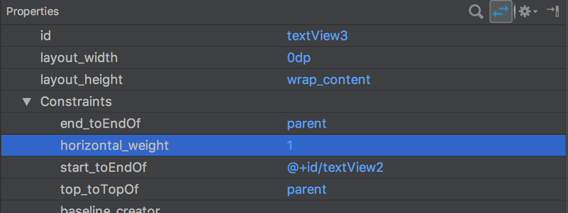
对特定的组件设置 spread 权重,首先得选择这个 View 组件,假设该 View 是在一个水平的 Chain 链中,那么需要在属性视图(properties 视图)中设置 android:layout_width="0dp" 然后修改 app:layout_constraintHorizontal_weight="1",如下所示:
这时候观察 View 组件在 blueprint 蓝图视图模式中的改变,它的上边和下边缘都从直线变成了类似手风琴的线条,这符号就表示了 spread 或 spread inside Chain 链模式下的被设置了权重的组件。
同时要注意的是,在 packed Chain 链模式下设置权重 weight 并没有作用。就是说并不像 spread 和 spread inside 模式中表现的占据尽可能的剩余空间,在 packed 模式下该组件就会被收缩成 0 大小。

在 XML 中设置 Chain 链
虽然假如在 XML 中存在特有的属性设置 Chain 链模式会比较好,但事实上并没有特有的属性,而是现有的约束条件的一种组合。在 XML 中设置 Chain 链模式只需要设置好双向互补的约束。本文中首个例子的 XML 源码如下:
|
在 textView 中设置了约束属性 app:layout_constraintEndToStartOf="@+id/textView2" ,而相对的在 textView2 也设置了约束属性 app:layout_constraintStart_toEndOf="@+id/textView" ,本质上就是创建两个约束条件,同一对锚点但是方向相反的约束条件,这就是 Chain 链的定义方式。
另外,textView 中的约束属性 app:layout_constraintHorizontal_chainStyle="spread" 就是指定了链模式 spread 你可以通过修改成 spread inside 或 packed 来切换链模式,而且这个约束属性必须在链头,即是链组件中的第一个组件。
而设置链模式的 bias 可以通过设置约束属性 app:layout_constraintHorizontal_bias="0.75" 从 0.0 - 1.0 。
最后,我们就可以通过设置属性 android:layout_width="0dp" 以及 app:layout_constraintHorizontal_weight="1" 来设置 Chain 链中组件的权重。